
The situation at 14:30 looking from the 'western' edge with Starsiedel in the foreground. The mass of troops to the left of the town are Marmont's newly arrived divisions with the Emperor at centre.

Another view showing the Russian reserve cavalry of Trubetzkoy at right (Starsiedel at left).

The situation around Kaja and Klein Görschen where Ricard, Brenier and Marchand's divisions supported by Laboissière’s small cavalry brigade faced the Prussian brigades of von Klüx and von Pirch I. Note the Russian Imperial Guard arriving from the far ('southern' side of the table).

Close-up of Marmont's divisions advancing in the face of von Berg's Russians and von Röder's Prussians.

Girard's division continued to hold on to the 'south' of Starsiedel, no doubt pleased with the support of Marmont's troops.

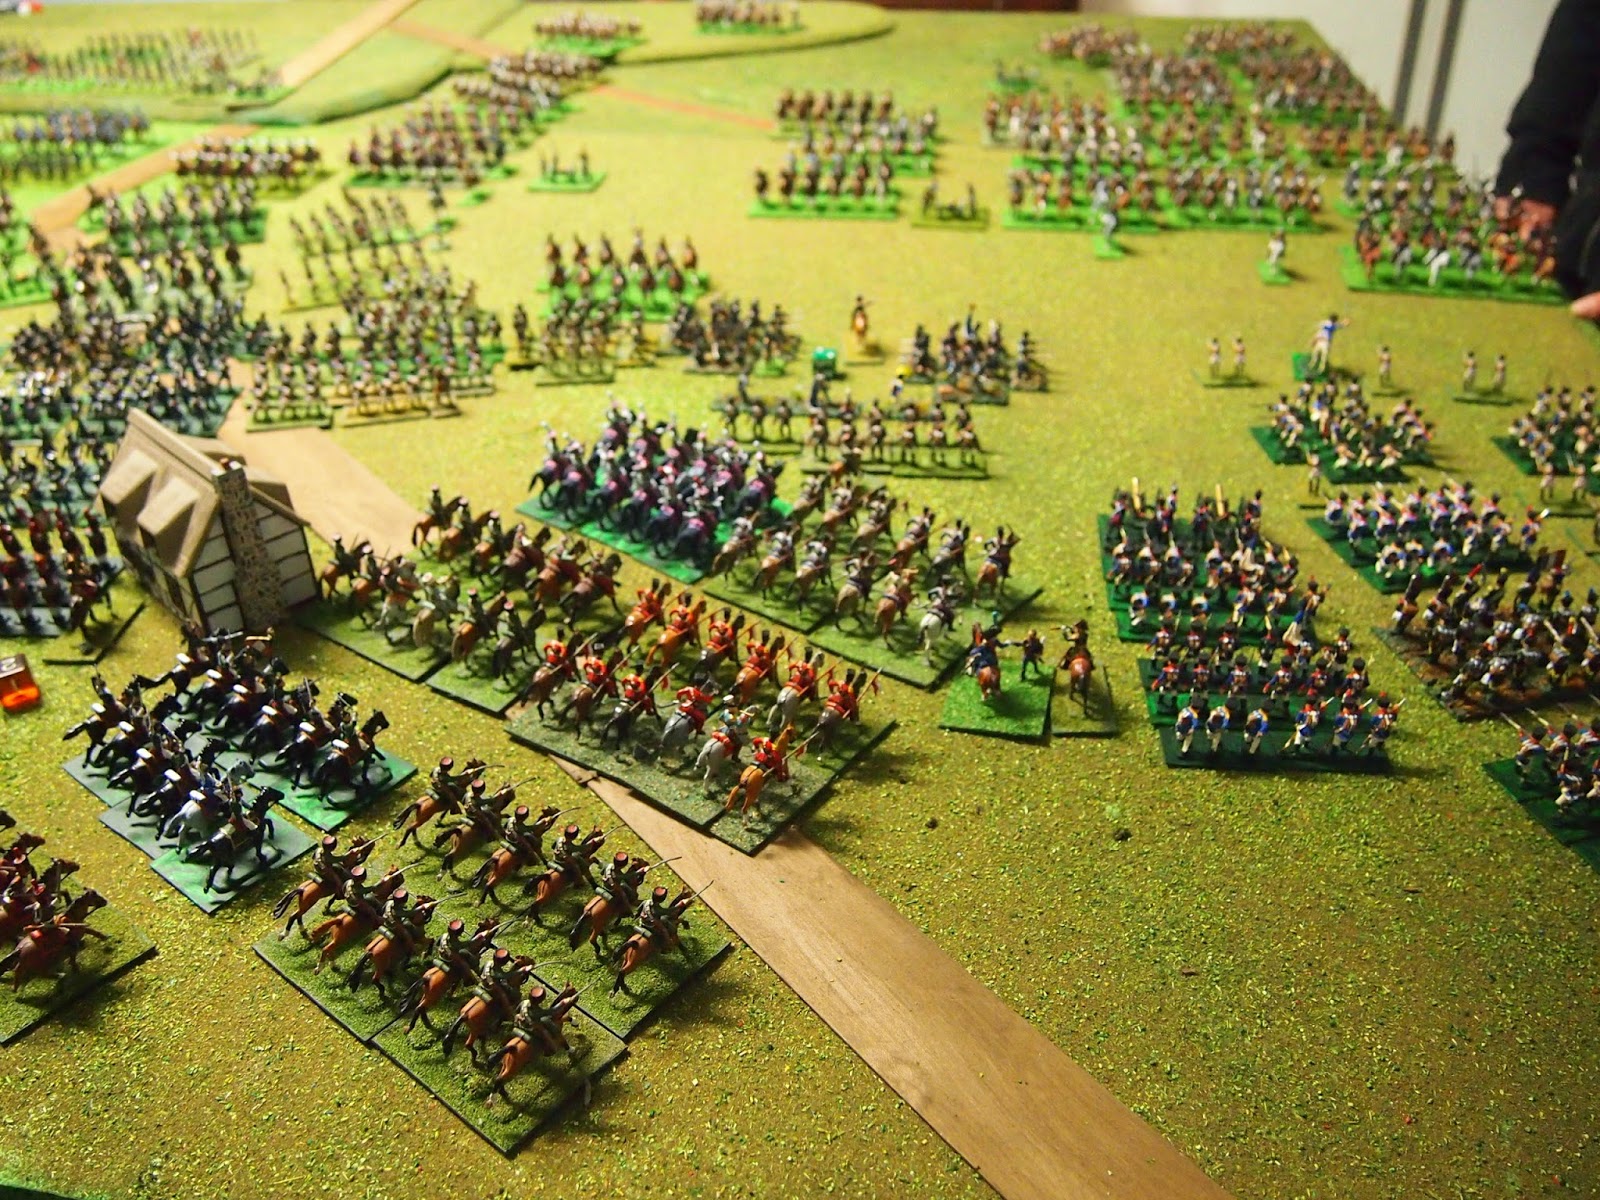
The view from the south-east with Eugène of Württemburg's II Russian Corps in the foreground, to the 'west' of the Floßgraben.

Prince Obolenski' Cossacks of Trubetzkoy's cavalry reserve.

The Russian Imperial Guard advance towards Klein Görschen in support of Blücher's Prussians (von Klüx and von Pirch I).

Further reinforcements: some of Gallitzin V's Russian heavy cavalry preparing to enter the field of battle.

On the French-Allied side, divisions of Marmont's corps and the Guard yet to make it on-board and Bertrand's corps soon to arrive.

The infantry of Compans' division (Marmont's corps) advanced cautiously towards the dragoons and grenadiers of Kasatschkosky's division (von Berg's corps). The French grenadiers in the left foreground represent the Artillerie de la Marine.

At their right, Bonnet's division (Marmont's corps) advanced to support Girard's men in front of Starsiedel (building at right of photo).

Better success for the French around Kaja. Ricard's division had all but broken von Klüx's hard-fighting Prussians.

To their right ('west'), von Pirch I's Neumarkt dragoons retreated after having been driven off by the 2/29e ligne of Brenier's division. Note the more successful 1st & 2nd Silesian hussar in the foreground.

Meanwhile von Röder's Brandenburg Hussars and West Prussia Uhlans had another "free hack" at Souham's retreating men (a pursuit that they began at towards the end of our first part of the battle)

Masses of Russian and Prussian cavalry as the first of Gallitzin V's cavalry arrived on-board (at right).

In close-up.

In the 'central' sector Ricard and Brenier's divisions (supported by Marchand's Germans) seemed to be making good progress having disposed of von Klüx's Prussians and now wearing down von Pirch I's... but the Russian guard approacheth!

View of the same with the Floßgraben at left, Klein Görschen in the centre, Eisdorf left-centre and Gross Görschen at the top-right of the photo (Russian Guard in distance).

Looking across the battlefield towards the south-west, the quadrilateral of towns is in the centre of the photo.

Support for von Röder as von Yorck's Prussian II corps began to descend from Monarch's Hill followed by Konovnizin's 3rd Russian Reserve Corps (grenadiers).

On the French side progress was still slow for Marmont's corps and the Young Guard, constantly threatened by cavalry.

Another view, this time from the true western corner.

MacDonald's corps entered the table from the 'east' around the road to Eisdorf. One of the many interesting and novel units in the 1813 campaign, Neapolitan élite regiment, is in the centre of the photo; note particularly the grenadiers and voltigeurs of the 7th line (yellow facings).

Near Eisdorf, Eugène of Württemburg's II Russian Corps prepared to oppose MacDonald's advance.

Wittgenstein's view from Monarch's Hill, "Is there no end to these Frenchmen?"

The Russian cuirassiers of Gallitzin V's corps move to support Dolff's Prussian reserve cavalry on the left flank of the army.

The view 'over their heads' showing Trubetzkoy's cavalry.

A pleasurable sight for any wargamer, particularly the Russian player!

MacDonald’s corps advanced on Eugène de Württemberg’s troops around Eisdorf

Dramatic events around Kaja. Brenier’s division had suffered the result of several successful charges by von Pirch I’s cavalry (with unit after unit failing to form square) and had broken, leaving Marchand’s division to face the music”. Near Klein Görschen, Ricard’s division prepared for the counter-attack of the Russian Imperial Guard.

Further to the west, von Yorck’s II Corps moved steadily north-west...

in support of the counter-attack of von Röder’s Brandenburg brigade and Kasatschkosky’s division on Compans’ division (Marmont’s corps).
The period from 17:00–17:30 (Turns 12 and 13) was a critical phase of the game. Here’s a photo summary, from east to west.

MacDonald’s divisions of Gérard, Ledru des Essarts and Charpentier (furthest to closest) made good progress against Eugène de Württemberg’s Russian infantry defending the Eisdorf area.

Same action showing Gérard’s Italians (heavily disguised as French line infantry in white uniforms) in the foreground.

On the other side of the Floßgraben, Ricard’s division has failed morale at 1/3 losses and retreated, bringing Laboissière’s small cavalry brigade to the frontline in support of Marchand’s hard-pressed Germans.

“Wittgenstein’s view”, Konovnizin’s grenadiers in the foreground, von Yorck’s II Corps beyond them and von Pirch I’s Upper Silesian brigade at right.

The Young Guard entered the fray, winning mêlées against Kasatschkosky’s grenadiers.
North-west of Starsiedel the Guard cavalry have deployed to support the French right flank. Morand’s division of Bertrand’s corps has entered the table at right, facing Dolff’s Prussian Reserve Cavalry and supporting the right flank of Girard’s division (in front of Starsiedel).
The game ended with the scenario as a clear Russo-Prussian victory, but the battle still in the balance. Once again here’s a photo summary, from east to west.

The arm-wrestle around Eisdorf continued, but...

events around Kaja were more decisive. Laboissière’s cavalry had some success against the Russian Guard, but were broken (leaving a huge gap). Ricard’s division had rallied (right foreground) and stood ready to support Marchand’s hard-pressed division (troops in square).

The Russian Guard had confidently occupied the area around Klein Görschen.

Konovnizin’s grenadiers formed a powerful reserve on Monarch’s Hill (apologies for the poor quality of the photo).

Viewed here from Klein Görschen.

The counter-attack by the Young Guard had achieved some success, but nowhere near as decisive as their historical counterparts.

The Guard cavalry, lead by the Berg Chevau-légers lanciers support Girard’s division, still defending around Starsiedel—yes, I know that the horses should be chestnuts, that was as far as I could get in time for the battle!
Finally, two views across the battlefield.

From the western corner.

Looking along the table from the south-west.
As night fell, the armies separated and set a nervous bivouac for the night, interrupted only by the occasional shot from nervous sentries. Both sides, confident of victory prepared to exploit the gains of the previous day. Fresh orders were sent and
The fictitious Day 2 of Lützen awaits.
Managing the transition from one day to the next
As Julian mentioned in a comment on an earlier post, we are going to use an approach that we used successfully for our games of Fuentes de Oñoro (we did it twice in succession!) to determine how to separate the armies ready for the next day of action.
The rule, edited to reflect Lützen, reads:
"Special MovementAt the conclusion of the 18:30 turn any units of the opposing armies that are in contact are moved so as to be at least 7” apart. This is done by moving the troops of each side a similar distance, except if one side is defending terrain or a town. In this latter case, the units of the ‘attacker’ are moved until the 7” distance is achieved. This is an absolute distance and is not modified for terrain. All movement is towards the friendly baseline.Once separation of the armies has been achieved, players secretly write orders for any redistribution of the divisions of their armies that they wish to carry out during the night of 2nd May. The orders should specify the division by name and indicate its new position clearly on the map. Once all desired moves have been written down, players announce the intended moves to one another and these are carried out. For the purposes of this rule a division may be moved freely within friendly lines (i.e. the area between the front line of friendly units closest to the enemy and the friendly baseline). There are no restrictions on the distance of this move.Each division may only be moved once in this manner. Once all of the redistribution moves have been carried out, orders are “written” for each division and the game resumes with the 06:30 turn of 3rd May."
The opposing lines on our table of Lutzen are not so clear-cut as they were for Fuentes, so our rules will require some interpretation to determine the fairest and easiest way to carry this out. We want to ensure that we have the best possible game but also to reflect the gains of the previous day.
I was thinking that I may need to ask the Russo-Prussians to do most of the falling back in some parts of the "western" end of the table (around the Starsiedel area) so that we don’t end up with a game played over a tenth of the available table area.
We'll have a talk about it when we are all standing around the table and can measure some distances and see "what's what".
One carry-over effect from our scenario game that we will simply and easily implement is to dictate that all casaulties incurred during the previous game will stand for our fictitious day two.
We have the game scheduled for 10th August and I expect it to be a “cracker”!


