The coming together of our groups for this game was a year in the making.
By a wonderful bit of serendipity I ‘met’ John from the SWAG courtesy of the Hat Forum. Discovering that we were wargaming ‘neighbours’ we said the usual, “we must get together for a game sometime.” After a few failed attempts and meeting in person, we committed to this weekend game of the Battle of Talavera.
Apart from the obvious reasons of playing a great wargame and getting some of the members of each of our small wargaming groups together, the game was also intended as the first real play-test of the SWAG in-house Napoleonic rules, Empire & Fury. Having used Empire (III and then V), they desired a set that would enable them to complete games of larger Napoleonic battles, without the long-winded detail of Scotty Bowden’s rules. To this end they have recently started to compile their own rules, using Empire as the basis/inspiration, but with many ideas from Fire and Fury.
The line-up for the game was John, Neil and Mitch (the latter as umpire) from the SWAG and Mark and I from the ANF. Another member of the SWAG, Dave, came along to say hello and for a look, staying for the daytime part of the game.
My wargaming ‘equipment’ was all that ANF HQ, where our game of the Battle of Bautzen was still in play, so I picked up some new D10 dice from Tactics. Mike assured me that they were guaranteed lucky dice and would roll any number between 0 and 9. More on them later.
I have already posted the set-up of the battle and a teaser with a few photos from ‘half-time’. Thanks to those who commented on those posts, it was great to receive them as we went along and to show the others. Of course, such things only encourage me, so you need to be careful…!
This report will tell the story of the game, using as many pictures and as few words as possible.
Above and below: the night of the 27th/28th was an uneasy time, following the earlier action on Cero de Medellin.
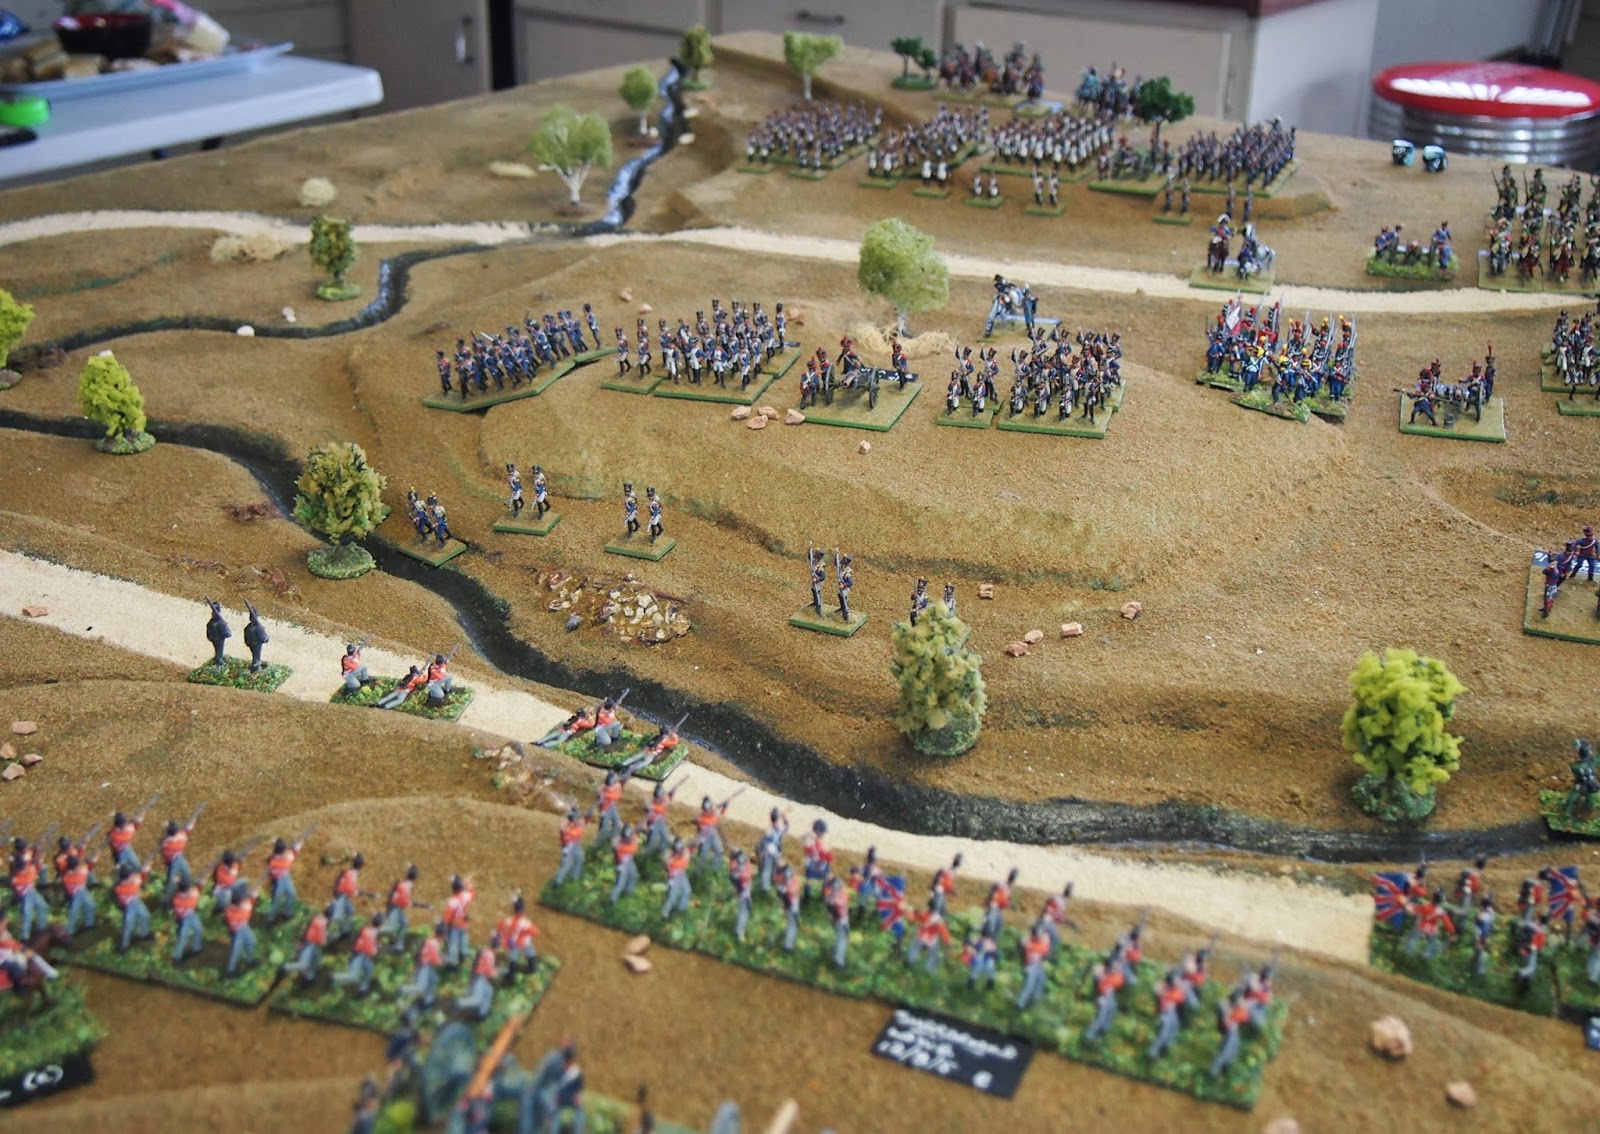
Above and below: dawn broke to reveal that Wellesley had reinforced his left and deployed his centre in the sunken road behind the Portiña Brook.
At 05:00 the battle commenced with a cannonade from the French artillery, as Ruffin’s skirmishers probed the British at the base of Cero de Medellin. This continued for three hours.
The companies of the 5/60th Foot (heavily disguised) from Donkin’s brigade of Mackenzie’s division moved to harass the cavalry battery of Victor’s artillery reserve.
The weight of casualties is a heavy burden to carry. The combined fire-power of the 5/60th and light companies from Donkin’s line regiments scored a hit on the French horse gunners.
Realising that the bombardment was making little headway, Victor sent forward Ruffin’s division with Villatte’s sent to attack around the right in conjunction with Beaumont’s light cavalry.
Victor also sent orders to Latour Maubourg to attack around the right flank. There was no movement and he received no reply (order failed to activate).
Above and below: simultaneously Sébastiani sent forward Leval’s division against the Spanish on the right of the Anglo-Spanish line and in Pajar de Vergara.
Above and below: Ruffin’s men followed their attack of the night before and once more attacked up the Cero de Medellin. The flanking movement by Beaumont and Villatte's troops was making good progress.
Lapisse’s and Sébastiani’s divisions joined the attack, committing the entire French-allied army, well almost…
Victor went personally to order to Latour Maubourg and was told by the general that, as the commander of the reserve cavalry, he only took orders from Marshal Jourdan (order failed to activate).
Above and below: Leval’s division began its attack on Zayas’ Spanish, including that heavy battery. While Merlin’s cavalry, supported by Sébastiani’s division, took on the Guards.
Above and below: meanwhile, in the north, Anson’s British and KGL light dragoons (hussars) had the better of the first encounter with Beaumont’s light cavalry, both sides re-gathering for a second contest.
Ruffin’s 1st Brigade launched its first, unsuccessful attack on Tilson’s Brigade.
An overview of the battlefield, from the north-west.
Merlin’s chasseurs à cheval crashed into the right of Campbell’s line.
Ruffin’s 1st Brigade prepared for another attempt on Cero de Medellin.
Leval’s men began to break-through around the Pajar de Vergara, but here come the ‘Amazons’!
Wellesley may look diminutive under his ‘elm’, but he was cool and calm; “I do not intend to run around like a wet hen!”
The second attack by Ruffin’s 1st Brigade was driven back by a volley from the 1/3rd line of Tilson’s Brigade.
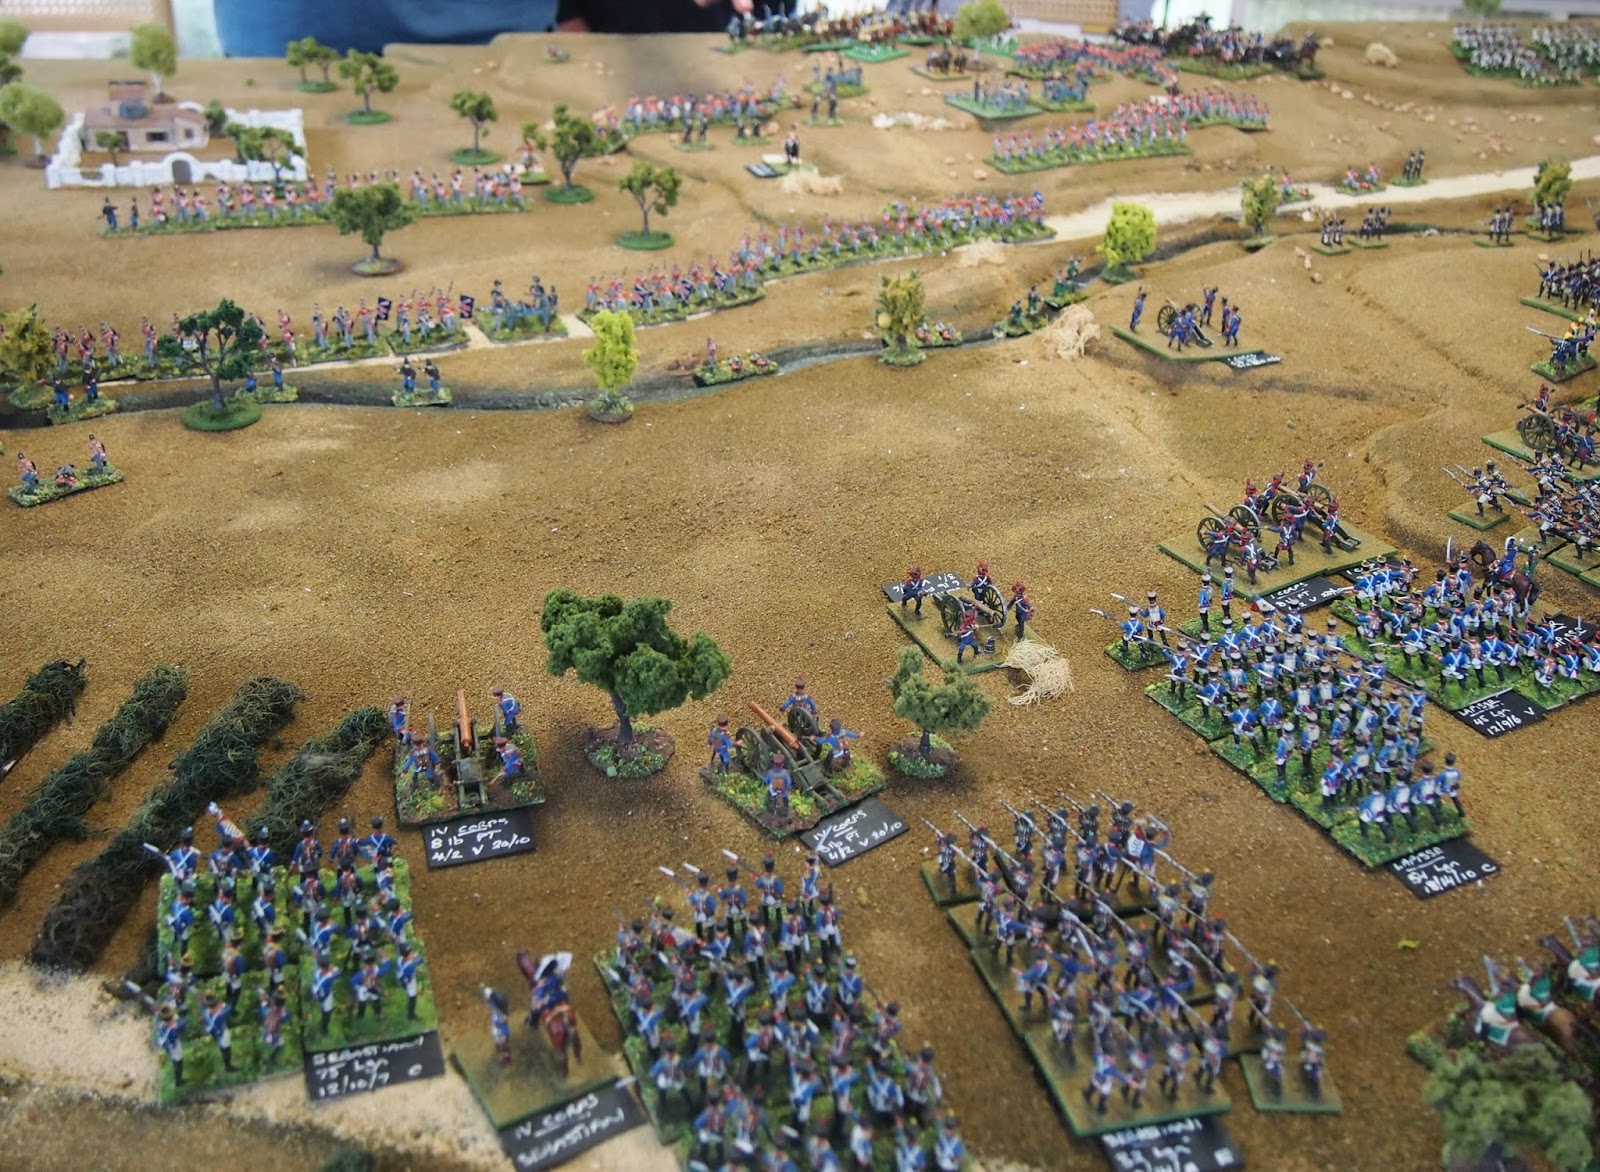
We had reached the critical point of the battle, so took a pause in the action. Below is an aerial view of the battlefield, beginning from the SE.
With the French-Allied forces attacking all along the battlefront, the thin red line was supported by just three ‘plugs’ in the second line, seen here with Stapleton-Cotton’s cavalry in the foreground.
After more imploring of General Latour Maubourg by Victor, “There will be none of that. There is no time”, he was able to convince him of the urgent need to send his cavalry to support Villatte’s division. He firstly sent the first and third brigades (1e & 2e dragoons and 14e & 25e dragoons respectively); i.e. their orders were activated. These were followed by the second brigade (4e/9e dragoons); i.e. orders activated, but delayed.
The French were not the only ones receiving reinforcements; Albuquerque’s Spanish cavalry move to support Anson's brigades...
as did Fane’s British heavy cavalry brigade.
With a roar of ‘Vive l’Empereur!’, the 9e légère charged home, despite a devastating volley from Tilson’s 1/3rd line that would have stopped most troops, driving the British back behind their second line; die roll of 19 against 4 on two D10.
(Note to Mike at Tactics: those dice that you sold me really are ‘lucky dice’!)
Further along the line, Lapisse’s division was preparing to attack the British positions to the south of Cero de Medellin.
Overview of the battlefield from the north; Latour Maubourg’s cavalry rushing to support their countrymen.
In the south, Leval’s troops sought to exploit their advantage against the remainder of Zayas’ 1st Division.
The 9e légère’s moment of glory was short-lived, thanks to a flank charge from Fane’s 3rd dragoon guards.
Lapisse’s 16e légère were driven off by a devastating volley from Sherbrooke’s 1/61st Foot.
Villatte’s division was now completely pinned by the British cavalry…
but help was on its way.
With Latour Maubourg’s dragoons close at hand and the 1st KGL light dragoons still in disorder after their last charge, Beaumont’s 2e hussars saw the opportunity to break the stalemate in the on-going, rolling mêlée with their enemy number. They were mistaken. The KGL troopers cooly re-ordered themselves and spurred their mounts on. Meeting the French troopers at the trot, they opened their ranks, parrying their opponents wild attempts and slashing them as they lumbered past—die roll of 18 to 6 on two D10.
(Note to Mike at Tactics: unfortunately the dice are lucky for the opposition as well!)
Seeing their opportunity, the 14e and 25e dragoons of Latour-Maubourg’s 3rd brigade charged into the 23rd light dragoons, but, like their brother light cavalry, were driven back with some loss.
The weight of numbers began to tell though and the 1e and 2e dragoons of the 1st brigade arrived to take the position.
Meanwhile in the south…
Leval’s Germans, had broken through the courageous Spanish, only to be driven back by Stewart’s 1st battalion of Detachments (comprising elements of the 42nd and 92nd Highlanders). Beaumont's and Sébastiani's troops were also faultering against the British Guards.
With all the attacks blunted in both his northern sector and Sébastiani’s, Victor had to concede that his dream of a glorious victory over the British and their Spanish allies would remain just that.
Belatedly, Marshal Jourdan and King Joseph sent a message to Marshal Soult to hasten towards Talavera.
The battlefield fell silent.
Knowing that Soult’s army was not far away, Wellesley conducted an orderly retirement during the night.
The rules, Empire & Fury, played really well, especially given that it was their first real outing. As one who has played lots of games using Empire (mainly version III; before they got absolutely silly with detail and special cases), I was most impressed with what the SWAG fellas have done. Some tweaks and minor changes are lithat may be necessary. Mark and I both suggested that they do a few more games before making too many changes.
We concluded our weekend with a visit to the SWAG usual Tuesday night venue (aka Mitch’s place) where they are currently in the middle of a WWII game set in Malaya. No doubt a report will feature on their blog in the not too distant.
We really appreciated being able to be part of such a great looking, well planned and enjoyable game, so a big thanks to the Serpentine boys; John, Mitch, Neil (and Dave) for allowing us to join them.