For most wargamers, certainly of the Napoleonic variety, the 18th June is a momentous day in history. Last week we played a game based on a battle that occurred on that auspicious date, albeit 58 years prior to the one which we, and numerous others, will be re-fighting in its bicentennial year of 2015.
Background to Kolin, 18th June 1757
Having secured an alliance with Britain, Frederick II of Prussia pre-empted the mobilisation of the Austrian, French, Russian and Saxon armies with his attack on the latter state on 29th August 1756. Quickly knocking them out of the war he incorporated the Saxon troops (reluctantly and eventually disastrously,) to reinforce his own. Buoyed by this early success, Frederick invaded Bohemia, hoping to repeat the dose.
He defeated Browne’s Austrian army before Prague, forcing them to retreat into the city, which he then besieged. Austrian Marshal Daun, ordered to relieve the city, marched directly on Prague, then headed north-west in an attempt to outflank Frederick’s left. Frederick in turn attempted an outflanking manoeuvre of his own, but Daun learned of the threat and turned his 60 000-strong army towards Kolin. He arrayed his troops in an 8 km line with the centre in a strong position on the Pzerovsky and Kzeczhorz hills.

Photo 1: Our game (based-on) Kolin, showing the strong Austrian position.
Early in the afternoon of 18th June, Frederick attacked. Considering the Austrian left and centre too strong, he marched his 32 000-strong army across the Austrian front so as to attack with his left (Zieten and Hülsen), joined in echelon by the centre (Moritz), while refusing his right.
Frederick’s plan unravelled. His right was delayed and provoked to attack by some grenzer that Daun had placed in the wheat field forward of the Austrian left. Moritz lead the Prussian centre to attack prematurely, driving at the strong Austrian centre rather than supporting the attack on the enemy right. Frederick further weakened his centre in an attempt to sure up his right, and the gap that had developed between it and his centre.
Taking advantage of the surprise caused to Hülsen’s ‘left hook’ by the infantry and cavalry that he had positioned behind the oak wood on his right, Daun sent in well-timed counter attacks by his Saxon cavalry and Austrian infantry and the Prussian army was soon in full retreat.
Our Game
The Battle of Kolin, fought on 18th June 1757, is often subtitled ‘Frederick’s first defeat’. Mark laid out a game for us, loosely based on the battle. Our aim was two-fold. Firstly, to play a game utilising most of his figures for the Seven Years’ War, the majority of which he has painted in the past year. Secondly to revisit, in Mark’s case, and use for the first time, in mine, a set of rules that served as his first introduction to the hobby, The Wargamer's Handbook.


Photo 2 & 3: Layout of the table, showing the well-worn cover of Mark’s copy of Zimmermann’s booklet of rules. View looking roughly east, Austrians at right.
The Wargamer's Handbook: Rules for Wargaming in Six Periods of History by Richard (Dick) Zimmermann was first published in 1973. I immediately took a liking them, chiefly because of a couple of standout aspects to me; the alternative movement system and the resolution of melees, but I really enjoyed the entire mechanic of the rules.
A big attraction of the rules for me is the way that Zimmermann deals with the turn sequence, or ‘cycle’ in his parlance, particularly alternate movement. A simple die roll (or card draw) decides the ‘winner’. That player may elect to go first or invite his opponent to do so. Charges are declared (we wrote these down). The player moving first moves his units half of their movement, as determined by orders (which we did in a 'Shako fashion’ of defend, attack such and such position/troops or move/manoeuvre to such and such position). The other player then moves his troops half their allotted/desired movement. Both sides then fire (considered to be simultaneous). The player who moved second then completes his movement, followed by the player who moved first. Thus in a simple and quite elegant manner Zimmermann reaches a reasonable and workable mechanism as to when in the move firing occurs, negates the advantage of moving first or second and enables a lot to happen in a single cycle, representing one hour.
Mêlées are resolved as the penultimate act of the cycle. This was another aspect of the rules that I particularly liked. Each side gets a score determined by the weighted value of each figure (determined by troop type and position (i.e rank occupied) in the mêlée) multiplied by the sum of two D6 to give a total. The side with the highest score is the winner. Losses (in figures) are determined as a proportion for each side that is read off a table for the winner and loser against the respective die roll in the mêlée. The loser retreats in an ‘orderly' or ‘disorderly’ fashion, based on a die roll, losing three points of morale along the way. The winner gains three points of morale and may pursue, remain in place to rally or move up to a full move back to rally, also depending on a die roll. At the end of this movement a cycle is complete.
Now, multiplying the number of figures by a value and then a die roll may sound like too much mental maths for those used to modern rules, but it was actually not too onerous. Also, since the required result is simply which side gets the highest score it is possible to determine this based on the numbers involved in the calculation without completing the arithmetic or, in some cases, the die roll may be a give-away as to who has won.

The mental maths involved is not too onerous!
That’s enough about the rules for now. Let's get back to the game. I’ll include a few more comments and observations about the rules as I describe what happened.

Photo 4: The Prussians (Mark) won the roll and elected to move first. Being gentlemanly, the Austrians invited them to fire.

Photo 5: The system for artillery fire is yet another excellent mechanism. For each battery firing, the owning player rolls two dice. One determines the direction, the other the effect. In this case the Prussians rolled a ‘5’ and a ‘2’, a slightly wayward shot that caused one casualty on the Modena cuirassiers and a bounce-through casualty on the Sachsen-Gotha dragoons behind and to their left (out of the photo)!


Photo 6–8: Their heavy guns lined up the Austrian grenadiers, but a roll of a pair of ones meant a wayward shot that caused no casualties. Lucky Austrians!
Another aspect that I liked. Zimmermann has mixed up the random factors so that results of 1 to 3 produce increasingly good results for the player rolling the die. This then ‘re-sets’ so that the same is true of 4 to 6.


I’m partial to rules where each side takes losses in a mêlée so, you guessed it, chalk another one for Zimmermann’s rules!

Photo 11: The Hadik boys retreated in an orderly fashion… off the board.
(The narrow board at ANF Annexe 1 meant that mounted troops would be likely to retreat off-board in this game.)

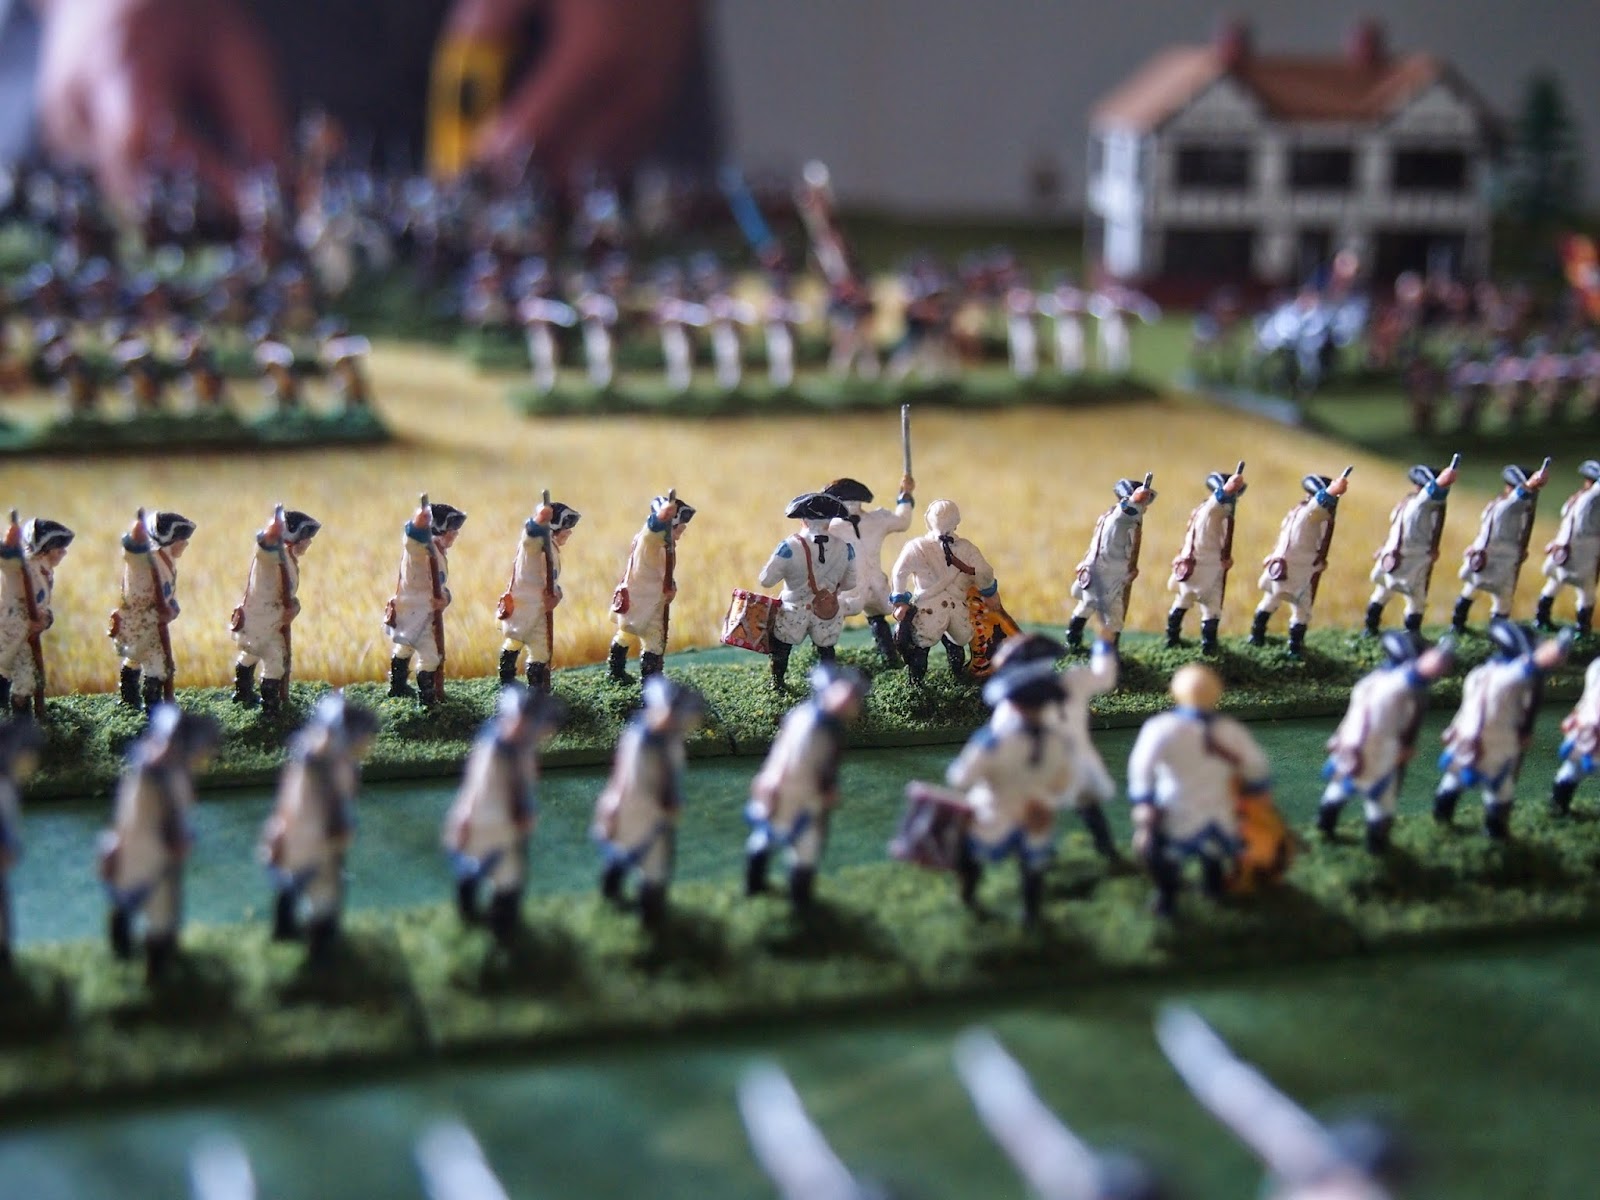


Photo 12–15: In the second cycle the Prussians once again moved first, advancing along the whole line.

Photo 16: Good shooting from the guns with Weid’s grenadiers took heavy toll on the advancing Prussian grenadiers.
The rules are at a scale of around 1:20. This meant that the effect of canister was quite devastating in our game, so we would need to adjust it for our larger figure ratio.

Photo 17: The Prussian guns were also ‘on song’ this turn (up-turned figures done purely for the camera).

Photo 18: The Erzog Joseph dragoons caught the Prussian hussars at the halt, avenging their hussar comrades!
Let's pause to take an over-all view of the table-top at the end of the second cycle.
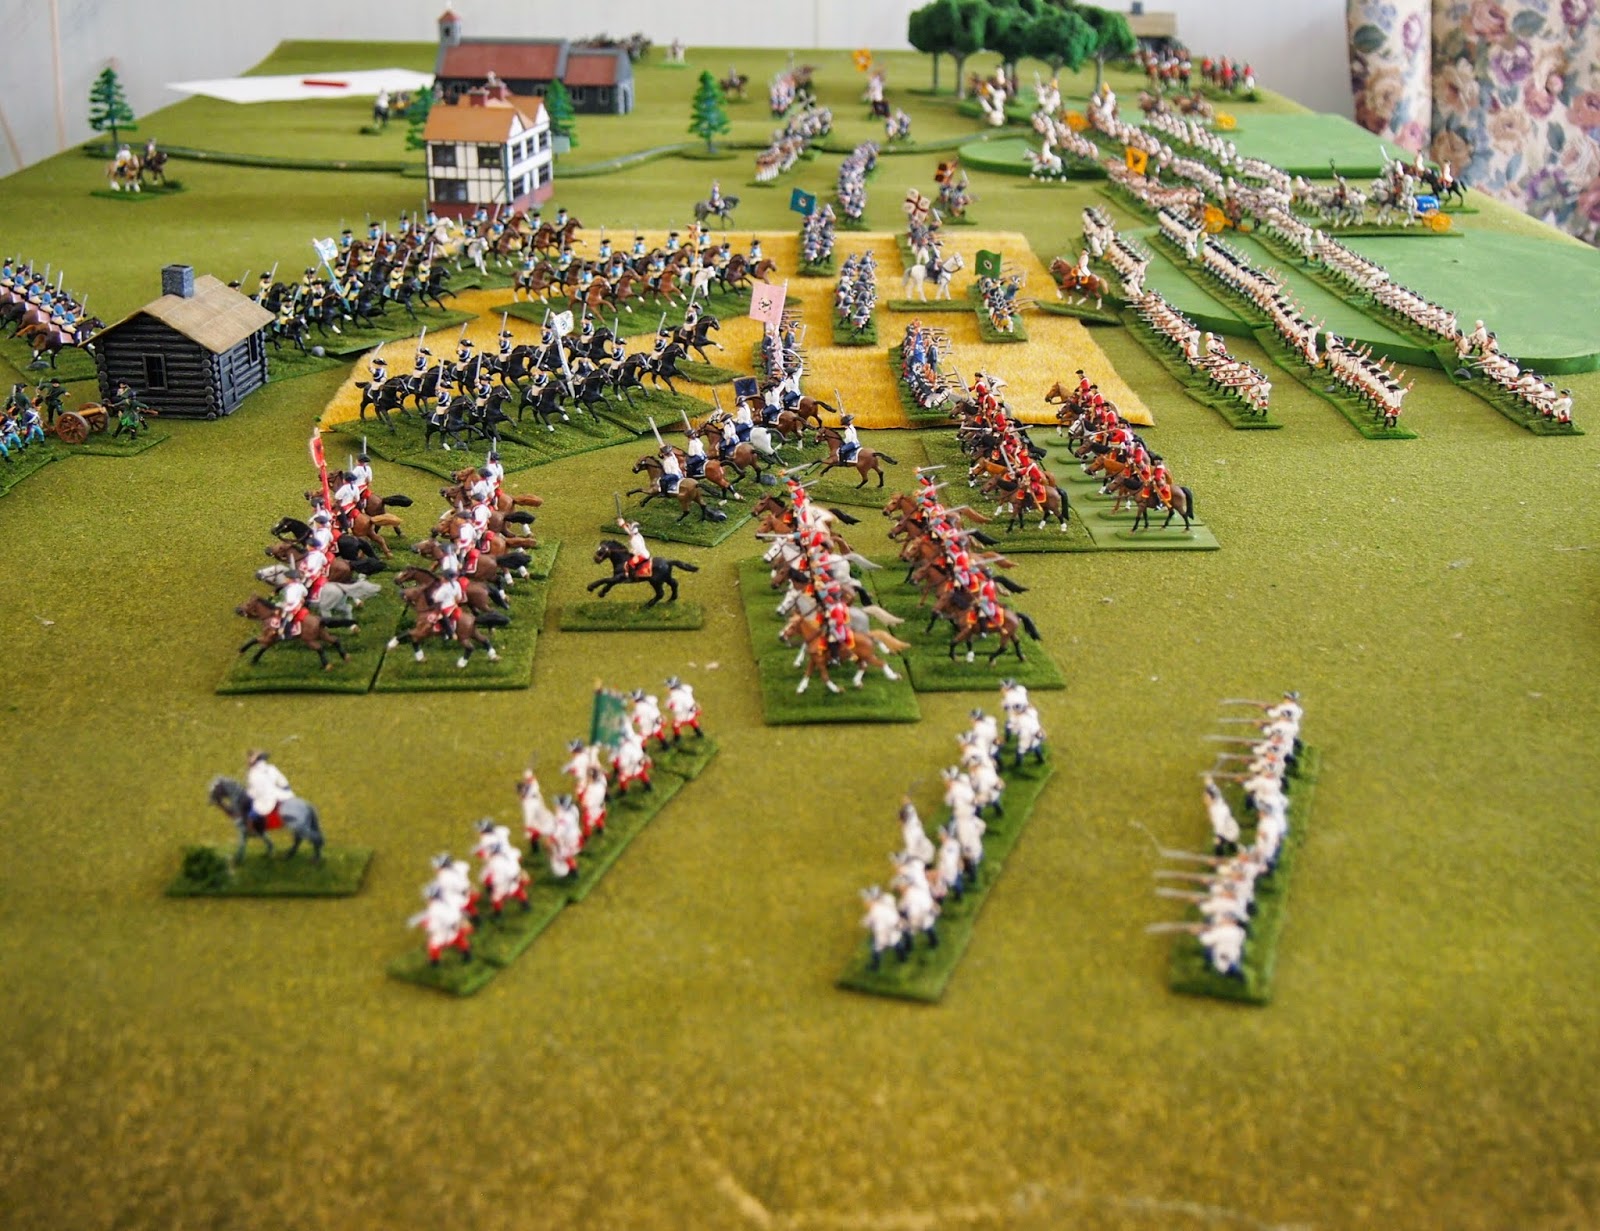
Photo 19: Firstly, roughly from the west.

Photo 20: The same view, slightly elevated.

Photo 21: From the Austrian (south-ish) side of the table. Note the rules being consulted. In a booklet of only 74 pages most questions can be answered, if players are prepared to play in the 'right' spirit.


Photo 26: Sincere and Starkenberg’s brigades still form an impressive defensive line on the Pzerovsky and Kzeczhorz hills.

Photo 27: In the east, the remaining cavalry gather for a final mêlée…

Photo 28: which is won by the Prussian hussars…


Photo 32: The retreating Prussian horse set off a chain reaction causing several of their comrades to retreat also.


Photo 34: Starhemberg’s infantry continued to hold out against Bevern’s Prussian infantry.
The accumulated losses were sufficient for the Prussian army to fail its morale test and so would quit the field.
Some final photos.


Photo 36: View of the battlefield at the end of the game, looking from the north-west.
Further thoughts on The Wargamer’s Handbook
In addition to the points that I have mentioned above, there are a number of other facets about the rules that I liked.
- Variable morale
At the beginning of the game we threw dice to determine the morale level of each unit. Modifiers can be used for élite and guard units, but we did not utilise them. This gave starting morale levels from 1 to 6. These may increase or decrease following a winning or losing mêlée (as I mentioned in the description of the rules above). The highest that we reached was 9, but it could get to 12 or 15 in limited cases. A unit must retreat when its morale reaches 0, but can be rallied to above 0. - Command
Simple rules provide some meaning to the unit command stands. A die roll after a loss from volley fire or mêlée (only these as I recall) determines whether the unit’s commander is a casualty and, in the case of a mêlée, whether the unit’s flag has been captured. Loss of these impacts morale and the ability of the unit to act on initiative.
The role of senior commanders is limited to sending orders (directly or via aides) and to attempting to rally troops. - Unit break-point
A unit that falls below half-strength is considered to be ‘broken’ and is removed from play.
The booklet comprises base rules with chapters adding specific rules for ancients, mediaeval/renaissance, American Revolutionary War, Napoleonic Wars, American Civil War and World War Two. Obviously, such rules are quite generic. Zimmermann, who includes much humour and wit in his writing, clearly states that they are not intended to be all-encompassing, but are intended to get people quickly into playing games that are enjoyable, fast-paced and relate to the history.
The game that we played was over in four cycles (four hours), and things happened quickly, but not to the point of fast-play aspects where units are one-shot weapons and every attack is conclusive. One could add additional modifiers, special cases and the like—but I reckon this should be approached with caution as it would tend to defeat the purpose of a simple set of rules wouldn’t it?
Going back to a set of rules like this is surprisingly refreshing when such a set is well-constructed, has some genuinely unique, simple and elegant mechanisms and with the benefit of added experience and maturity to fill in ‘gaps’.
Interestingly, after we had completed our game, and I was 'waxing lyrical’ about how much I enjoyed the rules, Mark mentioned/remembered that several years ago he had re-fought the Battle of Barossa (1811), as a direct re-fight, doing everything exactly per the accounts of the battle. The casualties had come out exactly the same as history for the French and 20 more for the British. I thought that was pretty impressive for rules that occupy a total of 74 pages, covering six periods.
Overall an enjoyable and good looking game with the added interest of trying a set of rules that were refreshingly old, haha!! Thanks Mark.


